You’ve decided to become an entrepreneur and start an online store selling products. After examining your options you went with WooCommerce from WordPress over Shopify, Prestacart, and other options. You found a great web host, installed WordPress, installed WooCommerce, picked out a great theme, added your products and were ready to go live with your website when you noticed something strange. You’re view cart and checkout buttons don’t work, they just keep sending you back to your homepage. When you tried to Google it all you could find was outdated screenshots of WooCommerce and you might be wondering, what’s wrong?
I wondered this very question myself having just done a WordPress and WooCommerce installation for a client in Dallas. The answer is, thankfully, relatively simple. The issue is that when you install WooCommerce it doesn’t automatically assign pages to your store’s functions. You need to go in and set those up manually.
Here’s step-by-step instructions and screenshots.
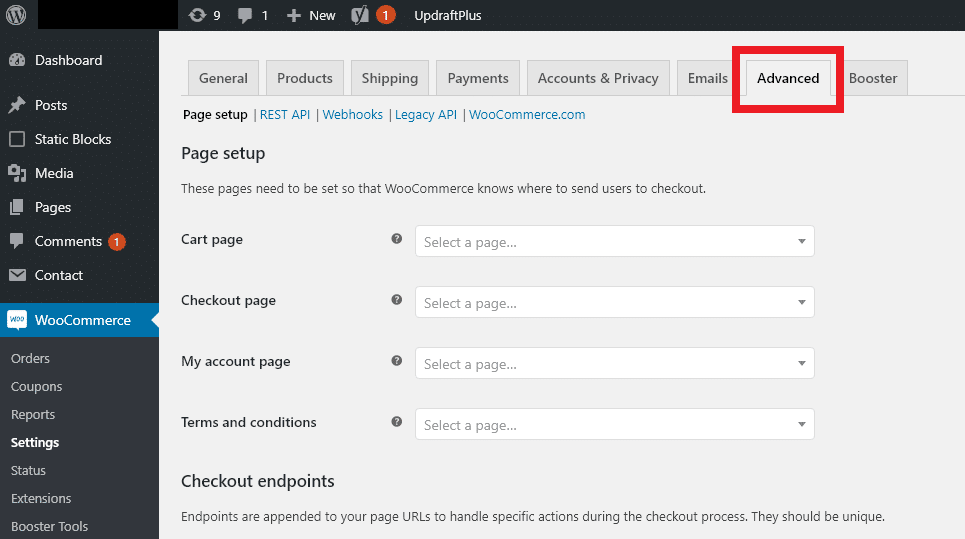
1. Open up your WooCommerce settings and navigate to the “Advanced” tab. You’ll find it between “Emails” and “Booster”.
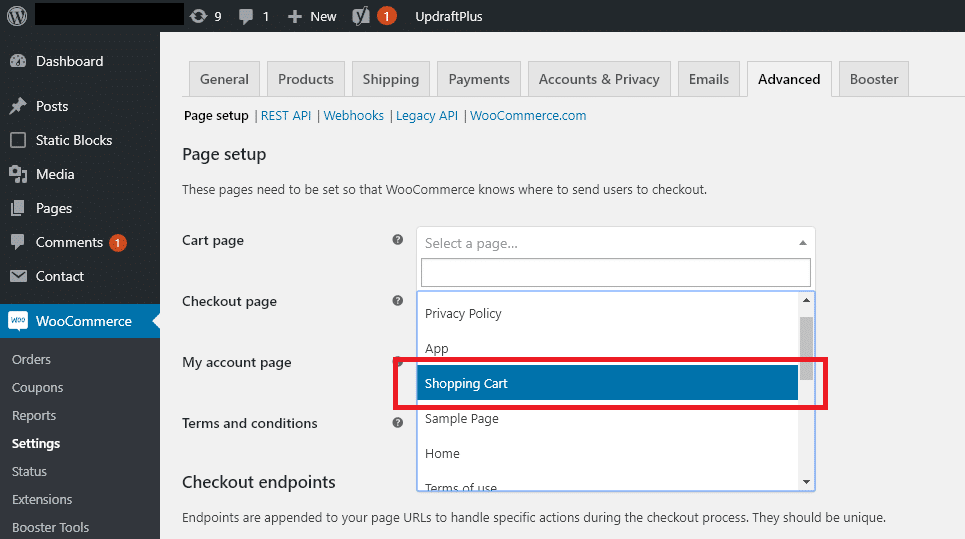
2. You should see 4 different empty dropdown boxed under the first heading “Page Setup”. Click on the dropdown box and select the page you want to use for each of these different functions in WooCommerce. Start off with the “Cart Page” selection. If you’re not sure which page to use then you’ll most likely go with a page named “Shopping Cart” for this function.
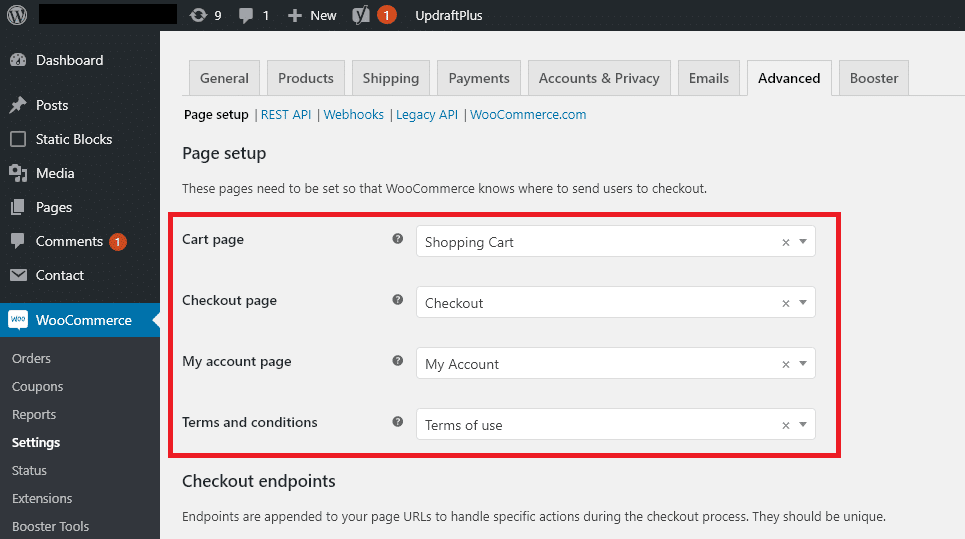
3. Repeat step 2 for the other three; Checkout Page, My account page, and Terms and Conditions. Once you’re done you’ll be finished and it should look something like the screenshot below. Make sure you scroll down to the bottom of the page and click the “save changes” button.
note: This article is based on WooCommerce version 3.7.0. Older versions will look different.


