Adding a description to Shopify Collection pages can have a positive impact on your the SEO for your Shopify website helping those pages rank better in search engines for shorter, higher-volume queries. Adding text descriptions might also help the pages themselves and the website look much less ‘thin’ to search engines, and potentially help an engine determine that the page or site is of higher caliber quality. This could all then result in increased product sales without any additional effort or payment.
Unfortunately not all Shopify users know how to add a description to their Collection pages and not all Shopify themes allow descriptions to be added to a Collection page. This guide will tell you how to fix these issues.
How to add a description to a Collection page
This is fairly straight forward.
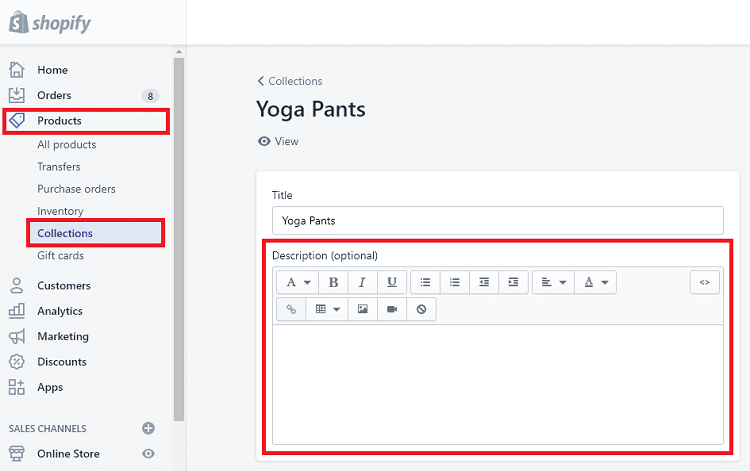
Once you login, you’ll use the left-hand menu to navigate to the Collection page you want to edit (Products -> Collections -> [Specific Collection]).
Here you’ll see a large field titled “Description (optional)”.
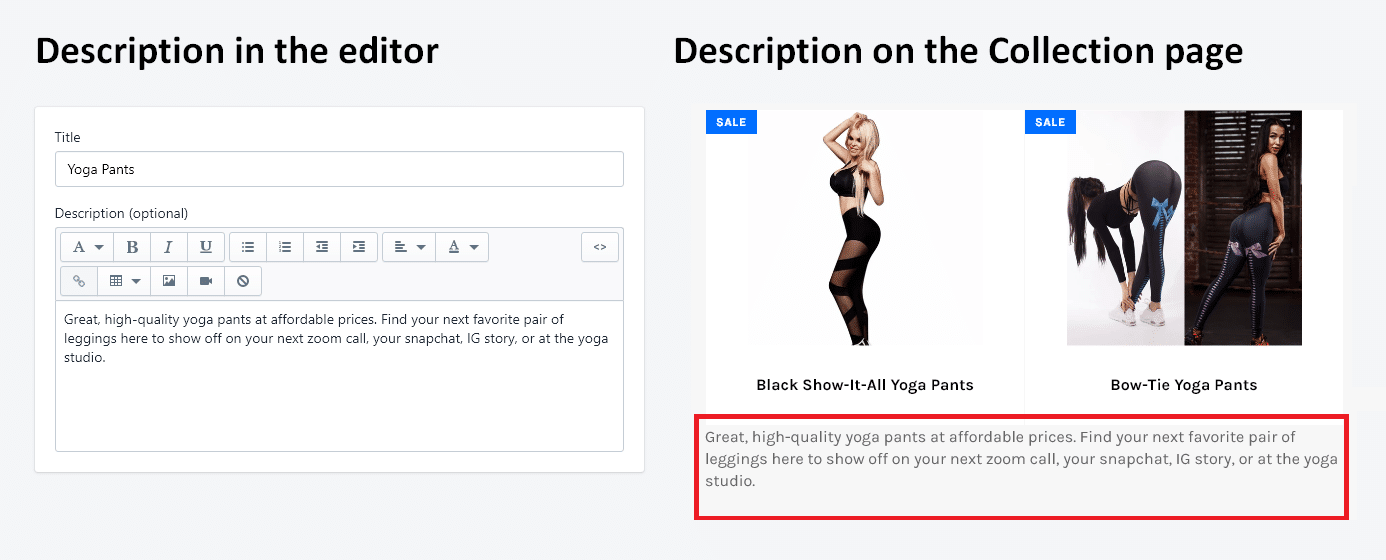
Write a description in this box, then click the blue “Save” button in the upper right-hand corner.
The description should now appear on your Collection page. Go to your website in another browser tab or window and check to see the description is there. If it is appearing and this is where you want it to be on your pages then you’re all done.
However, in many cases the description won’t appear or will appear in a place you didn’t want it to be. In those cases please read on about how to edit the code.
How to edit the theme to add description code to Collection pages
If your description is not showing up or is showing in the wrong place on your Collection pages, then you’ll need to edit your Shopify theme’s code.
To get to your theme’s code you’ll need to start by using the left-hand menu to navigate to your theme’s customization page. Select “Online Store” on the left-hand side, then “themes” (Online Store -> Themes). From here you’ll click on the blue “Customize” button next to your Live Theme’s information on the right-hand side.
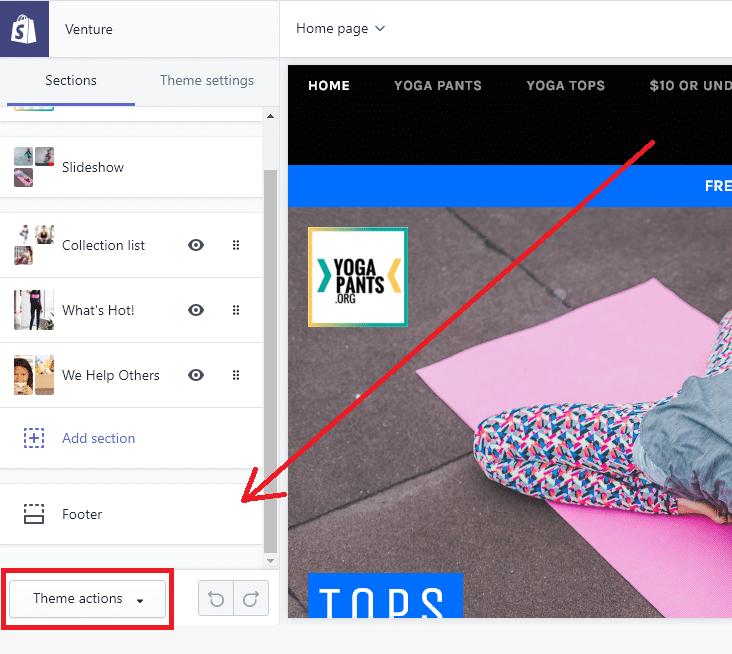
Once here you should see a new left-hand menu and a preview of your website’s homepage on the right-hand side.
Look all the way down at the bottom of the left-hand menu and you’ll see a static section that doesn’t scroll inside of the navigation with a dropdown menu.
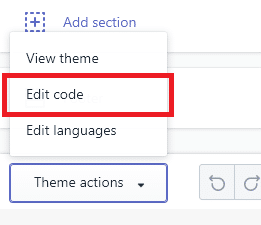
Select this dropdown menu and then select “edit code”.
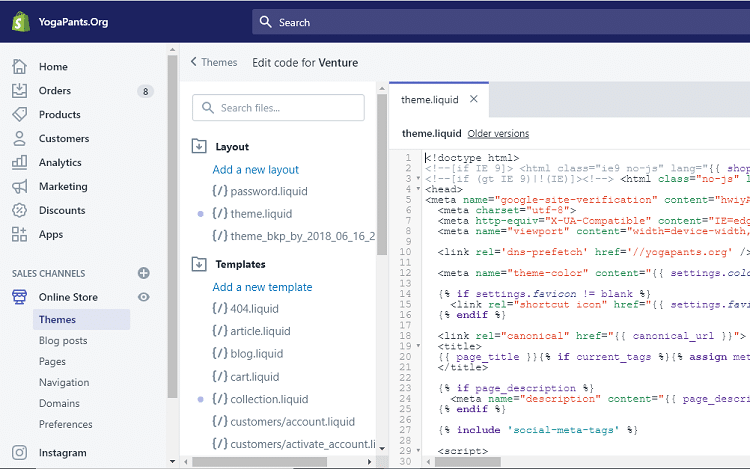
This will open a new tab or window for you. This new browser tab/window will show you the standard Shopify account left-hand menu with a second left-hand menu on the right followed by a page full of code. Shopify uses a language they developed called Liquid to code Shopify themes. What you’re looking at are the template files for all of the pages and actions on your Shopify store written in HTML with Liquid tags added in. Be very very careful here.
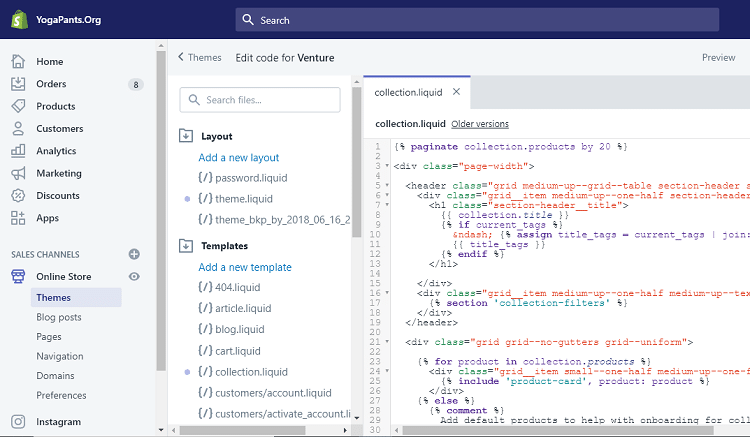
To edit the Collection page code you’ll want to use that second left-hand navigation to get to the template “collection.liquid”. This will bring up the code for your Collection page template.
Here we’re going to start by searching for “collection.description” inside of the code. We’re doing this to see if the code for the description is already added to the template but either broken or commented out. In Chrome you can do this simply by hitting Ctrl + F which will search only the code section of the page.
In our example here we didn’t find the code. If we had found it with comments we would have removed those, saved the code, and then tested to see if that worked.
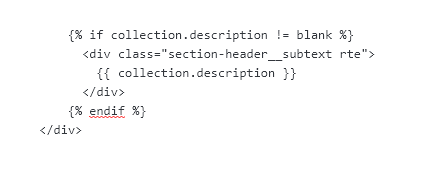
If you do find the code in you template and it’s not commented out, but you’re not seeing the description appear on your page refer to the code below to ensure it is written and working correctly.
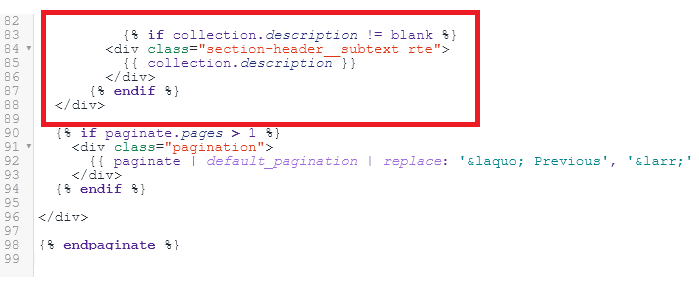
Add the code where you want it to be on the page. On our test site we wanted the description to appear below the product listings and above the pagination. Here is what the code looks like.
There you have it, you’ve now successfully added a description to your Shopify Collection pages and helped your website rank higher in search engines.
How to Add a Collection Description Below the List of Products in the Dawn Theme
The above instructions may not work for the Dawn theme and other Shopify themes. In that case here try these instructions instead:
1. Go to to “Online Store” -> “Themes” in the left-hand navigation of your Shopify admin area.
2. Here click on the “Customize” button below the current theme (at the top of the page).
3. At the top of the page select the dropdown the says “Home” and type the name of any collection into the search box, it doesn’t matter. Select that collection.
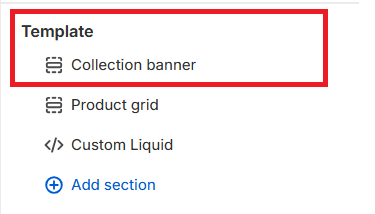
4. In the left-hand navigation you should now see a section called “Template” that has two items listed in it. They are most likely in this order: Collection Banner, Product grid. This means there is content above the products on this page, usually the page heading and description. Select the Collection Banner.
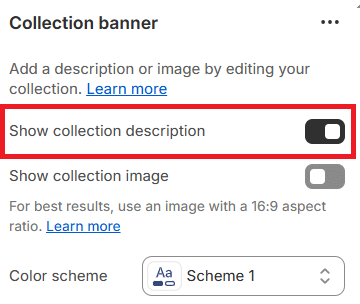
5. Now look all the way over to the right side of the page in the far right column and you should see a few options for this section of your collection pages. This section should include an option labeled “Show collection description” and be toggled on. Click/tap to turn the toggle off.
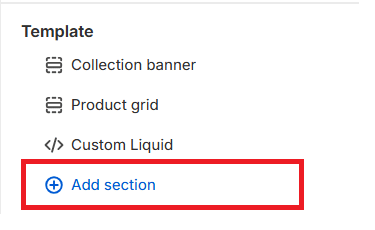
6. Look back over to the left-hand menu at the Template section and click or tap where it says “Add new section” at the bottom.
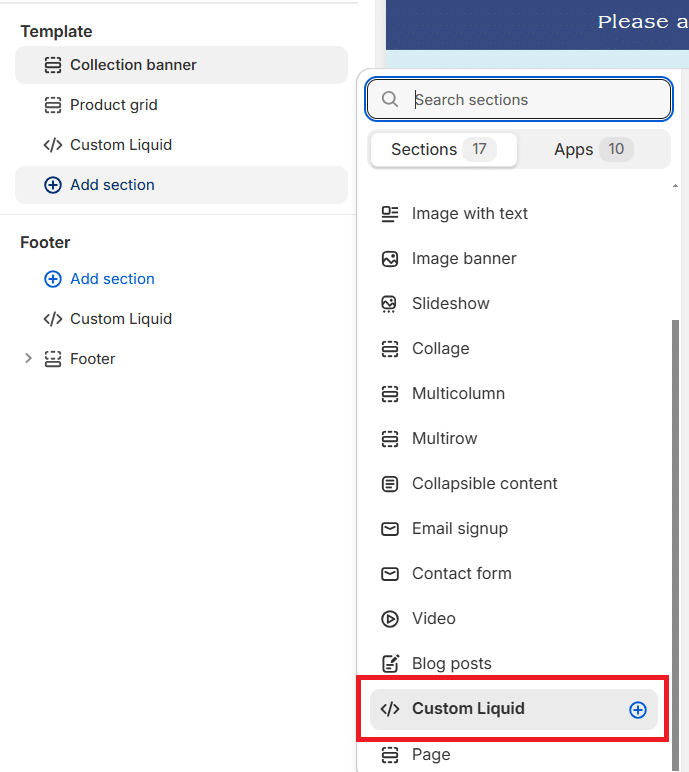
7. Scroll down and select the “Custom Liquid” option.
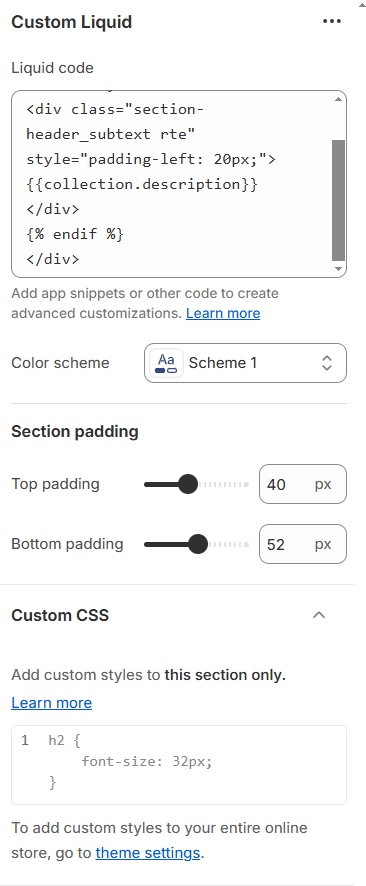
8. This should display an edit box and some options in the right-hand column. In the text field labeled ‘Liquid code’ add the following code:
{% if collection.description !=blank %}
<div class="section-header_subtext rte" style="padding-left: 20px;">{{collection.description}}</div>
{% endif %}
9. The above code includes inline styling to ensure the text has padding. You’ll notice the Dawn theme’s Custom Liquid editor has options to add padding and custom CSS, however, in many cases these do not work correctly so I’ve included the inline styling above to help you ensure your text can have some padding and not blur into the far left side of a user’s phone or monitor.
10. Once you adjust the styling to fit your store, this collection page will now have a description appearing below the product grid, allowing you to add useful content to help your customers shop a collection better and improve your SEO. You can add this to the Default Collection and any established collection layouts as well as you go. It is a little tedious sometimes, just focus on optimizing one page at a time if and when this is the case.

